Wednesday, 25 March 2015

How To Speed Up Your Android Phone Internet

8 Android Apps To Boost Internet Speed 

The holidays are coming and you know what this means — everyone who came home is helping to hog the home Wi-Fi. It is also the time of the year when we are treated with plenty of online content which can zap your data plan faster than you can say "What’s for dinner?".
Despite the availability of 3G and 4G cellular communication technologies which allow us to have access to the Internet wherever we are, it doesn’t hurt to get a bit of a boost when it comes to getting a faster Internet connection.
Here are 8 Android apps that can help boost speeds to tolerable levels, and help you survive the long holiday gatherings. Note that some of them only work with rooted devices.
Internet Booster & Optimizer
Internet Booster & Optimizer is an Android app thatcomes with a series of commands that prioritizes the browser among the other applications that are using the Internet. This means that one can dig out more speed from the available Internet connection. It usuallypauses the secondary apps that are using Internet, cleans RAM & cache memory and flushes the DNS to make sure that most of the Internet speed is utilized by browser only. [Get it here]
Faster Internet 2X
Faster Internet 2X provides a convenient way to get more speed from 3G and 4G cellular networks. The app is designed using special programming scripts that will boost the Internet speed to approximately twice of what’s available. This provides a better Internet user experience.It works fine with both rooted and non-rooted Android phones. The app displays ads that can be disabled. [Get it here]

Internet Speed Booster

Internet Speed Booster isan easy-to-use app with a sleek and minimal design. It uses aunique algorithm that can increase the Internet Speed of your Android device with a single tap of your finger. Internet Speed Booster app is designed in a way that has it working impeccably with rooted as well as non-rooted Android devices. [Get it here]

Internet Booster (Root)

Internet Booster (Root) uses a different method for getting more out of the available Internet connection. It basicallychanges the configurations of system ROM to increase the Internet speed to 40% to 70% higher than before. Internet Booster (Root) only works with Rooted Android Devices which means one shouldallow the Super User privileges to run this application properly. [Get it here]

Free Internet Speed Booster

Free Internet Speed Booster is another Android app which could possibly help you get rid of the slow Internet speed. It increases the Internet speed from 40% to 80% more than usual byimproving the Ping latency, halting the unnecessary background apps and managing a balance between parallel connections. Free Internet Speed Booster does not require a rooted Android device. [Get it here]

Internet Speed Booster 3G/4G

Internet Speed Booster 3G/4G appenables a user to load websites and stream videos at a speed which is equivalent to 3G/4G Internet speed. It may increase the Internet speed from 30% to 40%. This depends on the strength of the signal available to the Android phone at that time. This app works for both rooted and non-rooted Android phones. [Get it here]

Internet Speed Master

Internet Speed Master is a nice app with around 1 million installs from around the globe. The app adjusts the TCP/IP settings by modifying the system files to improve the Internet speed of one’s Android device. It is advised to make a backup of your device’s content before trying this app. It isdesigned for almost all types of ROM and can be used for all Android devices. [Get it here]

3G Speed Booster

3G Speed Booster is a small sized app that helps you get more speed from your 3G. There are some background apps that consume Internet bandwidth excessively, 3G Speed Booster scans all the background apps that are using Internet and disables them to give twice the Internet speed to your Android device. This app works efficiently with 3G networks only. [Get it here]

All About Your Phone's Developer Options

Android developer options

There's more there than USB debugging

Hidden in the settings on your phone, (really, they are hidden by default) are settings used for debugging and application development. While plenty of us have dove in there to switch to the ART runtime or to enable USB debugging, there's a long list of options. While most of us will never use them, it's always nice to know what's going on under the hood of your phone.
Let's take a look at them, and see if we can't decipher some of these settings so that all of us have a better understading of what happens when you tap them. Come on, you've tapped them ...

'Unlocking' the developer options settings

Android developer options
As we mentioned, the developer options on your phone are hidden by default. This actually makes a lot of sense, because they are easy to "unhide" and most people have little need to use any of them. But everyone reading this is a bit more advanced than most people, simply because you are reading an Android enthusiast website.
Unlocking them is easy-peasy. Open the settings on your phone, and find the "About" section. Look through it until you see the "Build number" entry. Tap if five times in quick succession, and you should see a small dialog letting you know that you're now a developer. Try not to break stuff, mmkay? Or break everything — either way is good! Really, some of these settings can make your phone run really reallypoorly.
Let's have a look at them and figure out why.

The settings

Android developer options
  • Take bug report: Tapping this option grabs the current log files on your device, packages them up and prepares them for sending to, well, whomever you want to have it. It takes a minute or two after you tap it, and you'll see a notification once it's ready. Tap that notification to send it on it's way. Swipe it away to cancel.
  • Desktop backup password: You can use ADB to backup and restore things like apps and their associated data to and from your computer. This option forces a password on those backups, and they can't be restored without that password.
  • Stay awake: Checking this box will force the screen on your phone to stay on anytime and every time it is plugged in. This works with a wall charger or your computer's USB port, and is a great way to make sure you burn images into your screen. Don't use this one unless you need to!
  • Select runtime: Here is where (for now)you choose to use Dalvik or ART. ART is still experimental and what we have now isn't what will eventually be released in Android L. Some phones really don't like the current ART runtime preview, so refer to the forum for your particular device before going there.
  • Enable Bluetooth HCI snoop log: Sometimes, a developer (or security specialist) will need to capture and analyze Bluetooth HCI (Host Controller Interface) packets. Enabling this will place them in a file on the device storage (/sdcard/btsnoop_hci.log) for retrieval. You can then analyze them with a program like Wireshark.
  • Process stats: Everything you ever needed to know about the running processes on your phone. Go ahead and tap it, then tap one of the entries. For the layman, it's just a lot of numbers, but for a developer debugging his or her app, this information might save the day.
  • USB debugging: This is what allows your phone to communicate over the USB port on your computer via the Android Debug Bridge (ADB). You need to enable this to use things like DDMS, or to use ADB commands.
  • Revoke USB debugging authorizations: When you use a computer to debug over USB for the first time, you have to authorize it and set up a keypair. This setting revokes all those and forces you to do it again.
  • Power menu bug reports: Puts an option in the menu you see when you press and hold the power key to collect and send a bug report (as seen above). Very handy if you're testing something.
  • Allow mock locations: This setting will let you manually write location information, making your phone think it is somewhere it really isn't. Besides cheating at foursquare, this is useful if an app uses location information.
  • Select debug app: This setting lets you choose an application to debug. You don't really need to attach it to a debugger, but if you do it prevents error messages when paused on a breakpoint. If you don't understand what this means, you'll never need to use this setting and probably shouldn't. It's built for use with tools application developers use to make sure their app runs as intended.
  • Wait for debugger: This setting is greyed out unless you've set an app to debug. When set up and selected, it simply prevents the chosen application from starting until the debugger is attached. This is more application debugging stuff most of us will never need.
  • Verify apps over USB: Lets Google scan applications you installed via ADB for malicious behavior. This is a good thing.
  • Show touches: Select this to see a visual cue on the screen when and where a touch was registered.
  • Pointer location: This setting places an information bar at the top of your screen telling you the screen coordinates of the last place the screen was touched.
  • Show surface updates: Makes the edge of a "window" flash when its contents are updated. Annoying as hell.
  • Show layout bounds: Marks the edges of all the elements in a dialog so you know where any touch will activate them. Try this one, then quickly shut it off.
  • Force RTL layout direction: Forces screen orientation for right to left language support.
  • Window animation scale: Sets the speed for window animation playback. A lower number is faster.
  • Transition animation scale: Sets the speed for transition animation playback. Again, lower is faster.
  • Simulate secondary displays: This setting allows developers to simulate different screen sizes. It's pretty wonky.
  • Force GPU rendering: Forces applications to use hardware 2D rendering if they were written tonot use it by default. Sometimes, this does wonders. Other times, everything goes to hell. Be careful here.
  • Show GPU view updates: With this setting, any view that is drawn with the GPU hardware gets a red overlay.
  • Show hardware layer updates: Read what Romain Guy has to say about using hardware layers to back your applications views. This setting will tell you when those layers update.
  • Debug GPU overdraw: Overdraw happens every time the application asks the system to draw something on top of something else. This setting lets you see when and where this is happening so you know if it is a problem.
  • Force 4x MSAA: This setting forces multi-sample anti-aliasing (MSAA). Like any other computer graphics hardware, more AA makes things look better, but performance takes a hit.
  • Strict mode enabled: This setting flashes the screen when an application uses the main thread to perform long, intensive operations.
  • Show CPU usage: Places a tiny window in the upper right of your screen with information about the CPU and how it is being used. A neat one to play with.
  • Profile GPU rendering: This setting can either draw a graph on the screen, or write it to a file. The graph is a visual rendering of how hard the GPU is working. This is another really neat one to try.
  • Enable OpenGL traces: This setting watches for OpenGL errors, and places them in the log file you chose when you started it up. Nothing that most users will ever need to touch.
  • Don't keep activities: This setting destroys (as in, forces everything closed) any and every application as soon as you leave the main view. Nothing good can come of this, regardless of what you might have heard on the Internet.
  • Background process limit: Allows a custom setting of how many process can run in the background at once. Another one most of us shouldn't be fiddling with very often, if at all.
  • Show all ANRs: This setting makes every process show an "App Not Responding" dialog if it gets hung — even background processes that the user did not start. Useful if one application is interfering with another.
Android developer options
Clearly, most of us will have no need for the bulk of these settings. Also, getting in there and tapping things for the sake of tapping them can really make bad things happen. But it's always good to know what can be done, even if we never intend to do it.
Hopefully, this clears up a few questions about those cryptically-worded options and settings! :)

How To Get iTunes on Android


GETTING YOUR APPLE BASED MUSIC ONTO YOUR ANDROID DEVICE 

If you've been a long time user of an iPod, iPhone or iPad there's a good chance that the majority of your digital music collection is tied up inside iTunes. If you're moving on to pastures new with an Android device in your hand you're going to want to be able to listen to your music. While there is no iTunes for Android, there are actually a few different ways for you to get your iTunes on Android .

Manually transferring the files

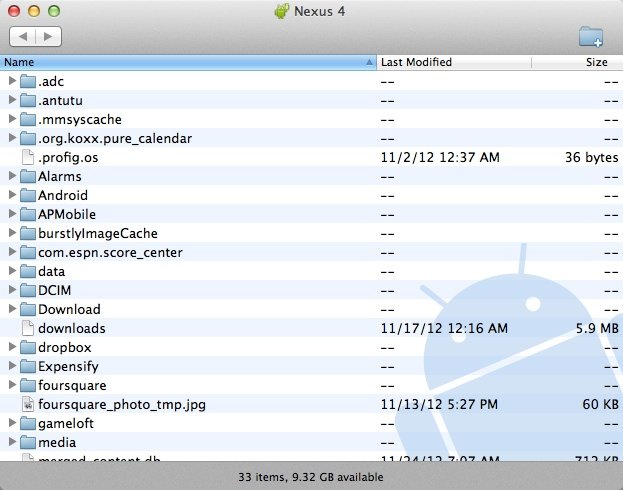
Ah, the old drag-and-drop method. Old fashioned, but it works just fine. All you need is the microUSB cable for your device, and if you're using a Mac you'll need to have the Android File Transfer app installed. You'll need to locate the directory on your Mac or Windows PC that houses the actual physical files. On a Mac you'll find it in Music>iTunes>iTunes Media. On Windows a good place to start is My Music>iTunes.
With your Android device plugged in you should be OK to just drag and drop music files between it and your computer. It works, but it's not exactly elegant.

AirDroid File Sync

AirDroid 3
If you'd like a wireless upgrade to your drag-and-drop, you'll find one of the fastest ways to get there is AirDroid. There are a ton of features contained within this Desktop app for managing your mobile device without actually picking it up, and one of those feature is wireless file transfer. AirDroid lets you select your music files for upload and then pull them back down using the app on your phone. While this method can get a little unwieldy if you have a large music library, it's plenty fast enough for those who are only moving a few albums. Additionally, if you're transferring large music files from entire album rips or large podcasts you may reach the individual file size limit for the free version of AirDroid. Fortunately, the upgrade to Premium is only $1.99/month and allows up to 1GB transfers.
Just select your files in AirDroid and wait for the app to tell you the file has finished uploading, then open AirDroid on your phone and tap each file to download on your phone. Once the files reach your phone, your music app of choice should be able to play them right away.

Using DoubleTwist

DoubleTwist
DoubleTwist has been around for many a year now and is arguably one of the finest ways to interface between iTunes and Android. The basic Android app is free to download and comes with a free Mac or Windows companion app to help you move your music about. With a physical connection your device needs to be able to support USB Mass Storage mode, MTP isn't going to cut it with DoubleTwist. But all isn't lost.
The DoubleTwist desktop app looks a lot like a stripped back version of iTunes. The sidebar on the left lists the content – photos and videos included – on both your Android device and your computer. In a similar fashion to iTunes you can move your music in one of two ways.
  • Highlight the tracks and albums you want to copy and drag them to the sidebar and drop them on top of your device
  • Use the sync settings to sync all your music or just selected playlists.
Speaking of Playlists, you can use the DoubleTwist desktop app to import your existing iTunes playlists as well as setting up some new ones. In the sidebar hit "Playlist Setup" and you'll be given that option. If you want to keep them in sync, tick the check box and every time you make a new playlist in iTunes you'll find it in DoubleTwist.
The exact same functionality is available wirelessly through the purchase of the AirSync application. This hooks into DoubleTwist on your Android device and lets your computer see it over your WiFi network. Almost exactly the same as iTunes is able to see your iPhone or iPad wirelessly, you're able to keep your Android music library in sync without the need to hunt for a cable. It does cost $4.99, but it works really, really well.
The beauty of using DoubleTwist is that you're given an end-to-end solution. The Android app is a superb music player and the desktop client gives you just enough options to make it easy to carry on using iTunes and not worry about keeping things in sync. Better still, if you've an Apple TV or set of AirPlay enabled speakers, DoubleTwist can hook into that and broadcast your music from your Android device.
DoubleTwist is perfect for folks with smaller libraries and those who like to chop and change what they're storing on their devices frequently.

iSyncr

iSyncr
If you're looking for the fastest way to get from iTunes to your Android device, without any real considerations toward user interface and extra features that may or may not be useful, the folks behind iSyncr have exactly what you want. The setup is incredibly simple, supports USB sync or transfer over your local wireless network, and is the closest to a one-click solution out there. All you need to do is install the Android app, grab the desktop companion, and either connect the USB cable or enter your IP address. Once the Android app and the desktop companion communicate, a scan of your iTunes library begins automatically. You're prompted with a list of things to transfer once the scan is complete, and the transfer begins immediately after. It's a little on the messy side because of the clumsy user interface, but there's no arguing with the results.
The iSyncr Android app comes in Lite and Pro versions, and the $4.99 upgrade gives you access to things like multiple iTunes account support and more feedback on your phone abut what is actually happening during the sync process. Just as the name suggests, it's for users who have a music setup that is a little more complicated than most and is absolutely worth the upgrade in those situations.

Using Google Play Music

Google Play Music
This is one of our favorites. The biggest downside to Google Play Music is that it relies on the cloud, but if you're OK with that then you can't go far wrong. It comes pre-loaded on all new Android devices and is a seamless way to keep your iTunes library synced. Everyone gets a locker for free big enough for 20,000 songs, and you're able to use it on up to ten different devices at any one time.
As with DoubleTwist, Google Play Music has a desktop companion application for Mac and Windows to help you along with the process. Unlike DoubleTwist it only uploads music to the cloud and doesn't directly put it on your device. The bonus is you get access to your music on all enabled devices – including any iPhones you might keep lying around now – with the drawback that you have to then download it from the cloud for offline access.
The Google Play Music app is insanely simple to set up. Once installed and logged in, you're able to point the app at your iTunes library and tell it to automatically upload any new tracks that get put in there. Just leave the app open and it'll take care of business in the background without you ever knowing. There are also options to control what you want uploading, and even to send specific playlists to the cloud.
Google Play Music is perfect for everyone since it requires no extra apps and no extra cost for full functionality. However, if you're not into streaming or don't want to keep having to download your music to listen to offline, you'd be better served looking at one of the other options up top.

Friday, 20 March 2015

Why is my Android phone running slow? Here's how to speed up your phone

Why Is My Android Phone Running Slow? Here's How To Speed Up Your Phone

When you first got your shiny new Android handset you were probably blown away by how fast it was. But over time you may well have noticed that your phone is starting to run slow. Don't worry - it doesn't mean that there's anything wrong with it. Here are some top tips you can use to help speed up your Android phone and get things running quickly again.
android l navigation buttons nexus 5 teaser02

Just about every phone on the market is liable to suffer from slowdown at some point in its life. Your Galaxy S5 could slow to a crawl, or your Moto X may motor less than it used to. You may notice that apps take longer to load than they used to, that there is a lag between tapping an option and an app responding, or things may just feel generally sluggish. You don’t need to put up with this.

    Running out of space

    All those photos you've taken and all of those apps you’ve installed can take their toll. Your phone needs a little breathing room to run smoothly and if you're running low on space, things can slow down.
    speedup1a

    You can check how much space you have left by heading to the Storage section of Settings. One of the first ways to free up space is to tap Applications can see which apps you can uninstall.
    speedup2

    Tap the entry for an app you no longer need and then tap Uninstall. You can repeat this process as many times as necessary for any apps you feel you can live without.
    There are other ways you can free up space as well. The files you have downloaded are probably still sitting in storage wasting space and can be removed. In storage, tap Downloads, select the files you want to remove and then tap the Bin button.
    speedup3

    Many of the apps you have installed use data caches in an attempt to speed up operations. This is effective up to a point, but if you are running short of space, it can actually be counter-productive. To free up this space, hit the Cached data option and then tap OK to confirm.
    If you have a lot of apps on your phone and you want to speed up the process, you can install an app called App Cache Cleaner from the Google Play Store. This allows you to clear the cache on all the apps you have on your phone in one go, so you don’t have to spend a long time doing it manually.
    Icon

    App Cache Cleaner - 1 Tab Clean

    INSTALL
    speedup4

    More files ripe for deletion can be found in the Miscellaneous files section. Tick the boxes next to any types of file you'd like to remove – backups, files that have been received via Bluetooth, playlist files, and so on – and then tap the bin button. You can keep an eye on how much space you have freed up by looking at the Available space section.
    You can also disable the apps that came preloaded on your phone but you really don’t use all that much. If you have rooted your Android, you can get rid of these apps easily. If not, you can simply go to the app properties and disable the app to prevent it from running and using up your phone’s resources.

    Cut back widgets

    All those widgets you have running on your home screen may be useful, but they also take up their fair share of resources.
    speedup5

    If you have any widgets running that you don’t really need, consider disabling them. There's no harm in having some active, but you will notice an element of slow down with too many running at the same time. Just be a little selective.

    Animations and extras

    Depending on the launcher you are using, you may find that there are various animations and special effects in place. These may look great, but they can also slow things down.
    speedup6a

    Check in your launcher's settings to see if there is a way to disable any of these unnecessary extras, and you could earn yourself a speed boost.

    Close apps and free up RAM

    Multi-tasking several apps makes it easy to switch between different tools, but there can also be an impact on performance. You can quickly close down any apps you are no longer using by calling up the running apps list Pressing and hold the home key and then swipe away any apps you want to exit.
    speedup7

    While you are at this screen, tap the pie chart button to the lower right of the screen and then move to the RAM section. Tap the Clear memory button and any background processes that are running unnecessarily will be closed down.

    Restart your device!

    A quick and simple fix for a slow device is to simply restart it. This can clear out cache, stop unnecessary tasks from running, and get things running smoothly again.
    speedup8

    Just hold down the power button, select the Restart option, and then tap OK to confirm.
    Do you have any tips and techniques you use to speed things up? Do you have any apps you use optimize the process?